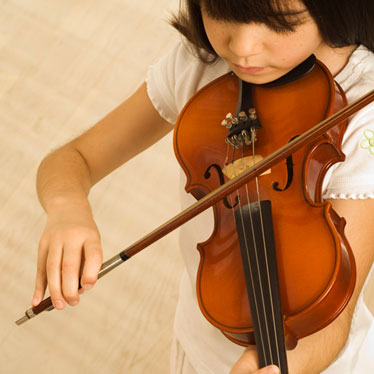
4 Tips For Better Violin Bowing

The way you bow your violin is critical to your work as a musician. First and foremost, the ergonomics of incorrect bowing – poor wrist-hand-arm alignment, incorrect motion, and incomplete/over extension – can cause chronic physical issues that will plague your career.
Second to your well-being is the effect poor bowing performance or technique has on the way your violin sounds – or doesn't sound – during performances. The wrong bowing technique results in weak, watery, bouncy and/or inconsistent tones, not to mention the intolerable squeaks that send family and friends running as far away as possible.
Fortunately, in addition to practicing your notes, improving your bow hold and bowing technique works wonders for creating the solid, consistent and rich tones that attracted you to the violin in the first place.
It Takes Time to Develop Proper Violin Performance-Technique
While technique doesn't improve overnight, routine practice, analysis, and more practice of proper bowing techniques builds permanent muscle memory. Just as prima ballerinas and professional dancers spend hours in front of the mirror to analyze their form, great musicians make mirrors a part of their practice space to repeatedly watch and correct, ensuring they include proper form and technique into their practice sessions.
So there's a bonus tip for you: practice in front of a mirror on a regular basis so you can constantly view and correct your posture and form. Even better, take a video yourself practicing on your phone.
It takes time to develop proper bowing techniques - and you may even find you have to revisit these techniques over the years, particularly when tackling new, difficult or complex pieces that take you out of your body and into the intellectual realm. However, by making form a part of your practice, and working with a teacher on a regular basis, you'll develop the healthy bowing and playing techniques that make all the difference in how your violin sounds.
4 Tips for Improving Your Violin Bowing Technique
Here are 4 tips that will make an immediate improvement in your technique and sound.
1. Hold the bow correctly
How you hold the bow determines the pressure and angle of the bow on the strings. Too much, to little, too angled, etc., and it affects the sound. Ultimately, bow grip should be so comfortable you don't have to think about it - allowing the hand to feel stable, in control, flexible and relaxed.
To hold the bow correctly:
- Find your natural grip by placing the hand palm-up, curling your thumb towards your middle-ring finger and relaxing. Now flip your hand back around. This is your natural grip. Replicate this position when you place the bow in your hand.
- Rest half of your thumb-tip on the frog "bump" while the other half rests on the stick. The part right below the thumbnail will rest on the bow hair for support.
- Let the other four fingers rest in their natural position, with the first three fingers curling over the stick while the first finger rests gently on top.
Your forearm may rotate inward just a bit - and the result is a relaxed, comfortable but controlled bow grip.
2. Keep your elbow at a right-angle
When you stand in front of a mirror, with your bow on the A string - halfway between the fingerboard and the bridge - you should be able to picture a square, with imaginary lines running from shoulder, to elbow, to the line made by your bow.
Readjust, bow across the strings and maintain that squared position. Now, run through a basic, 15-minute warm-up and watch to see if your arm maintains the squared position when you change strings. Adjust accordingly.
3. Keep that bow in the middle - and the middle
This one's a two-for-the-price-of one bowing tip. In the beginning - and even at intermediate levels - it's important to keep your bowing to the middle of the bow itself (not too close to the frog or the tip), and to move the bow across the mid-space between the fingerboard and the bridge.
Regularly check both of these positions and you'll gain better bowing control as well as a straight bowing performance technique - both of which are admired by teachers, audience members and musicians alike.
4. Keep the bow flat on the strings
It's true that experienced violinists tilt their bows a bit. Moreover, they've perfected their technique and have an inherent understanding of how tweaking the bow angle achieves a desired sound. As a beginner or intermediate player, however, it's better to keep the bow flat on the strings for control and depth of sound. Over time, you'll be able to relax this rule a bit.
These violin bowing tips are worth making a part of your regular violin practice and overall awareness. The result will be an enviable technique that allows you to tackle any piece you wish.
This article sponsored by Thomastik-Infeld


